

With the dog days of summer coming to an end, we can’t help but get excited for festival season that’s just around the corner. The Renaissance Festival, that is! Druids and wizards, gypsies and fairies, free-spirits of all types love to escape to the woods. Whether you’ve gotten your set of outfits all ready or not, there’s still time to get a stand-out costume planned in advance. If you’re bursting with enthusiasm like we are, it’s time to put that energy into good use and try out a cool, fantasy-inspired craft project. The geniuses behind Beadaholique have delivered with a magical tutorial of How to Make a Dragonscale Maille Bracelet.
Materials Needed: Two different chain maille jump ring sizes (18 Gauge, 5.95 mm and 20 Gauge, 3.57mm.) and Silver Plated Magnetic Clasps (6 x 4.5mm) and Jeweller’s Micro Pliers
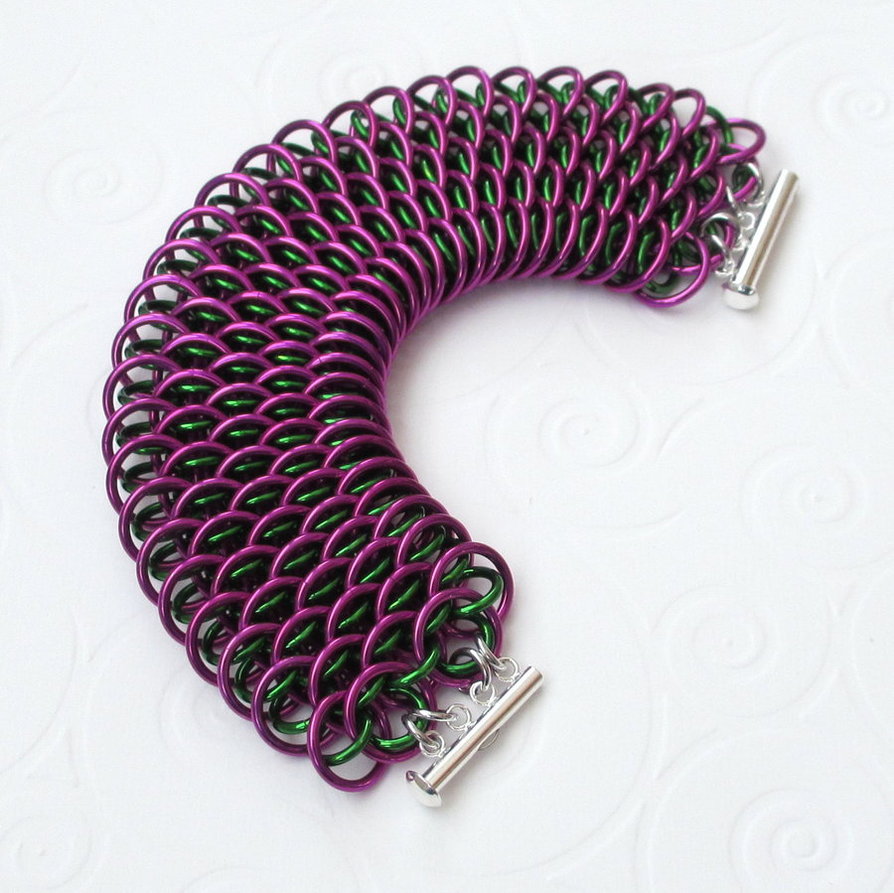
Before getting started, take measurements of your wrist to find out the overall length of your bracelet. Designer Megan Milliken suggests measuring to a nice, snug fit. Remember, when you add the clasp, this will add about ½” to the overall length.
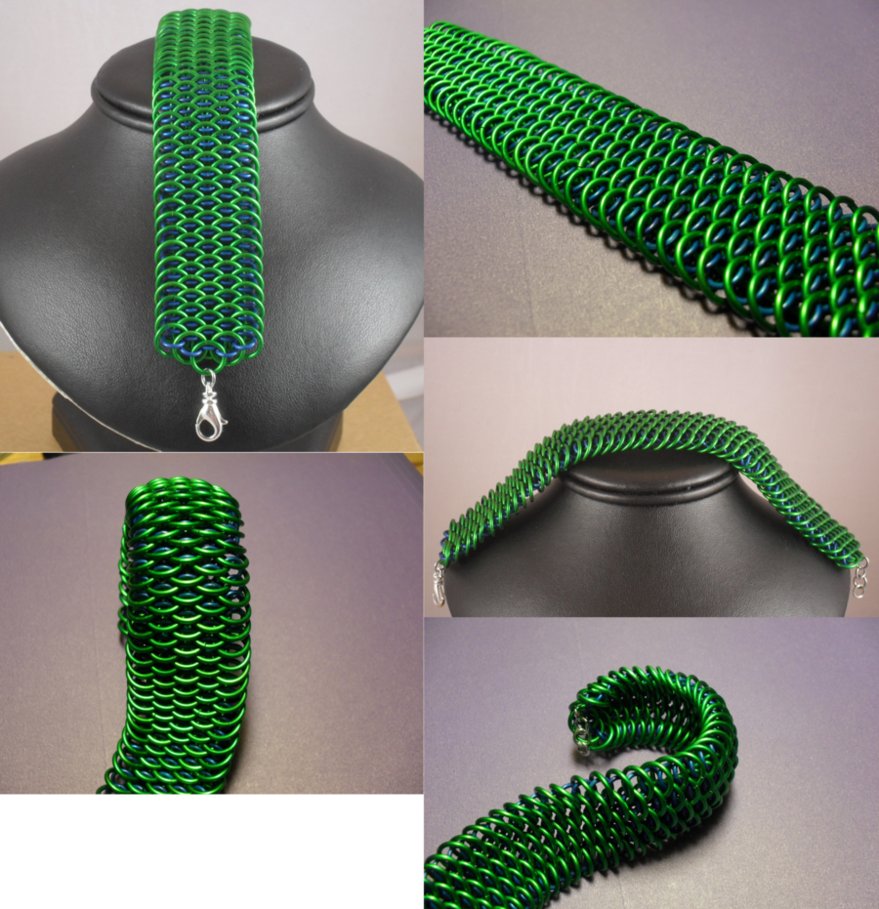
Using the instructional video: How to Make Dragonscale Chain Maille available on Youtube, you can learn the basic dragonscale weave used to complete this project. First, you’ll use the silver plated 18 gauge chain maille jump rings with an inner diameter of 15/64” and brass 20 gauge chain maille jump rings with an inner diameter of 9/64” to create a length of dragonscale chain maille. The overall measurement should include four large rings at its width and equal length as your wrist measurement, with both ends tapering down to one ring. Use a single brass ring to attach both rings from one end of the bracelet to half of a silver plated magnetic clasp. Find another brass ring to attach both rings from the other end and link them to the other half of the magnetic clasp.
Once you get into the swing of things, the possibilities are endless! You can vary the design by looking into different colors of rings and finishes for dramatic effects. Winter is coming, so why not get a head start on things by stocking up your inventory of amazing chain mail jewelry. As everyone starts to prep for the next Renaissance Faire, complete your one-of-a-kind mage costume with a dragonscale chain maille bracelet.
Written by Jade Nicolette


Matching Products:
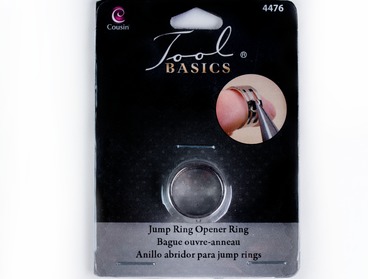
Jump ring opener
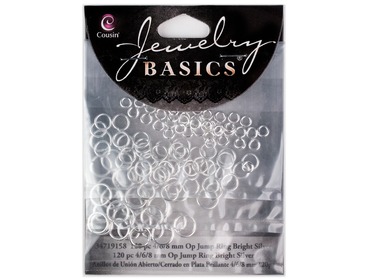
Multi-sized jump rings
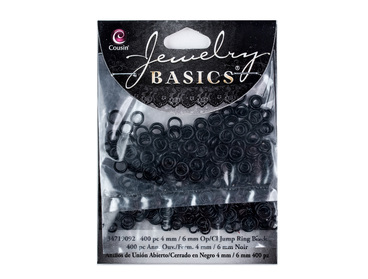
Black jump rings


The step about attaching both end rings with a single brass ring to the magnetic clasp clarified a point I’ve messed up before. It keeps everything aligned neatly.
I’ve been prepping for a Ren Faire and this fits perfectly with a mage outfit idea. The fantasy angle tied into a practical tutorial makes it more fun to dive into.
Nice balance between inspiration and instruction here, especially tying it to festival season. It actually makes me want to sit down and build a whole set of matching pieces.
The magnetic clasp choice is smart for something like this since chain maille can be fiddly to fasten. It keeps the bracelet practical without sacrificing the look.
The mix of silver plated and brass rings gives a nice contrast that really sells the “dragon” look. I might try darker anodized colors for a more dramatic finish.
The taper from four large rings wide down to one ring at each end is a clever way to transition into the clasp without bulk. That step often gets glossed over elsewhere.
Good call on using micro pliers specifically, since regular pliers can struggle with the smaller 20 gauge rings. That tool choice makes a big difference in clean closures.
I like that you included the exact ring sizes and gauges, because dragonscale can look off if the proportions aren’t right. The note about tapering to one ring at the ends was especially helpful.
Including the width guideline of four large rings helps visualize the final bracelet size much better. It’s a simple metric but really useful when planning the piece.
Using both 18 gauge and 20 gauge rings to build that layered scale effect makes sense now after reading this. I always wondered why my previous attempts looked flat.
I appreciate the mention of the Beadaholique video since dragonscale weave can be tricky to visualize from text alone. Having both resources makes it much more approachable.
The suggestion to experiment with different finishes is spot on. I could see this looking incredible with black and red rings for a more aggressive, fantasy aesthetic.
I didn’t realize how important ring diameter ratios were until this breakdown. The 15/64 and 9/64 pairing seems to be the key to getting that layered dragonscale texture.
The reminder to measure the wrist snug and account for the extra half inch from the magnetic clasp saved me from making it too loose. Small detail but really important for wearability.