

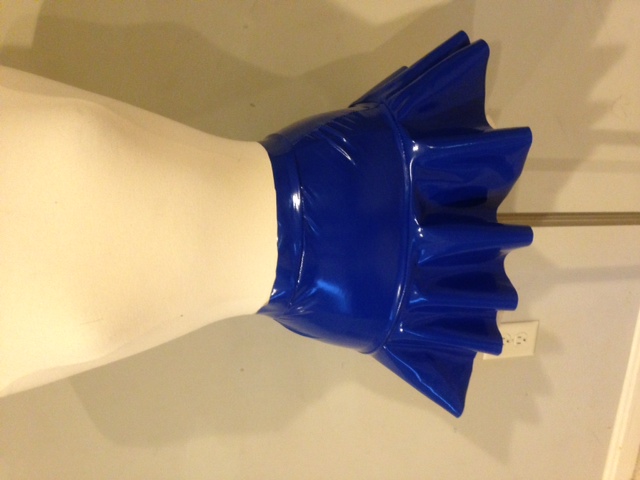
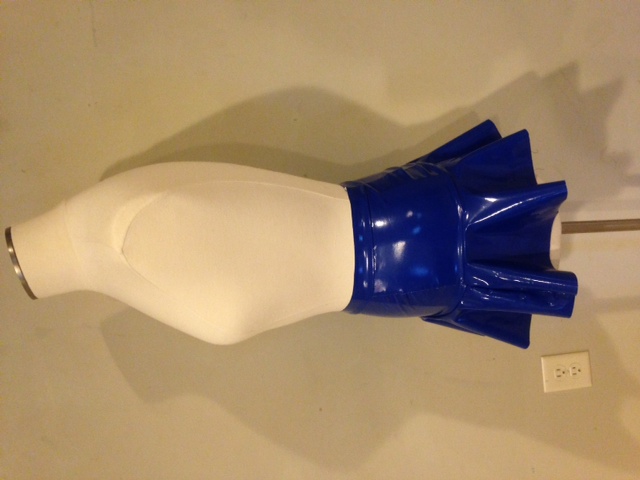
Below you’ll find instructions on how to make a royal blue vinyl ruffle skirt from our 4-way stretch vinyl. It’s perfect for making a Sailor Moon Cosplay outfit! Check it out:
 Step 1: Gather your supplies

- 1.5 yards of royal blue stretch vinyl
- Ruffle skirt pattern
- Leather sewing needles
- Seam ripper
- Pins
- Fabric Scissors
- Roller presser foot
- Matching thread
- Thread snippers
Step 2: Cut out the pattern pieces
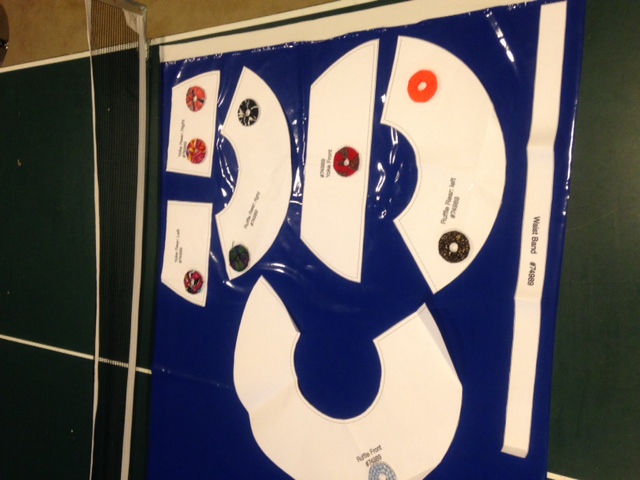 Cut out your pattern pieces from your fabric. Space your pattern pieces to use the least amount of fabric as possible.
Step 3: Setup your sewing machine
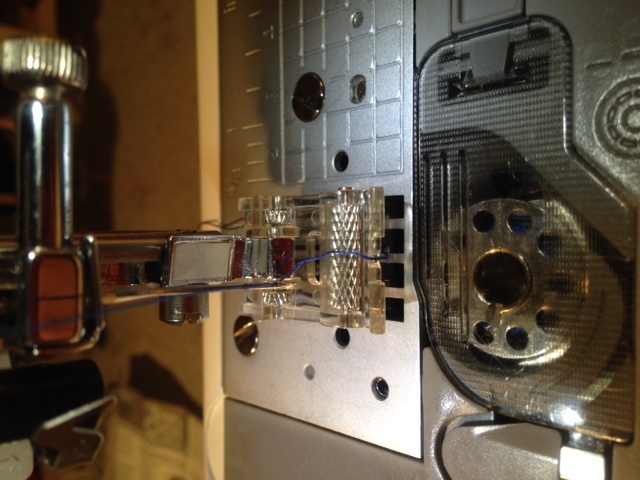 Before you begin sewing, attach the roller presser foot to your sewing machine, making sure your thread is positioned through the hole provided on the rolling foot’s center.
Step 4: Sew yoke and ruffle
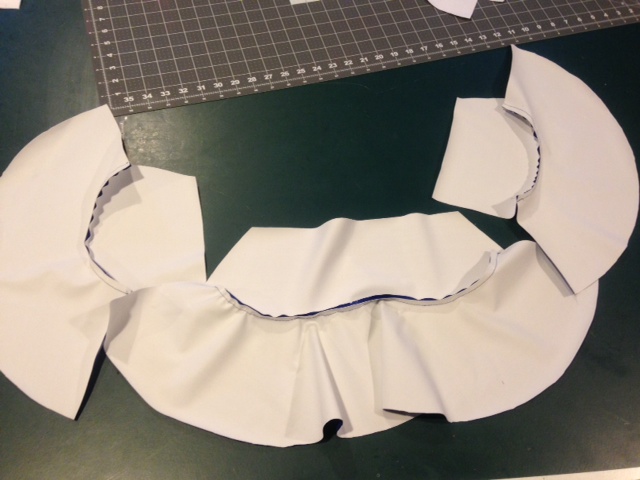 Sew the front yoke to front ruffle (using ¼ seam allowance), then sew the back left yoke to the back left ruffle (1/4 seam allowance), and attach the right left yoke to the back right ruffle.
Step 5: Sew side seams
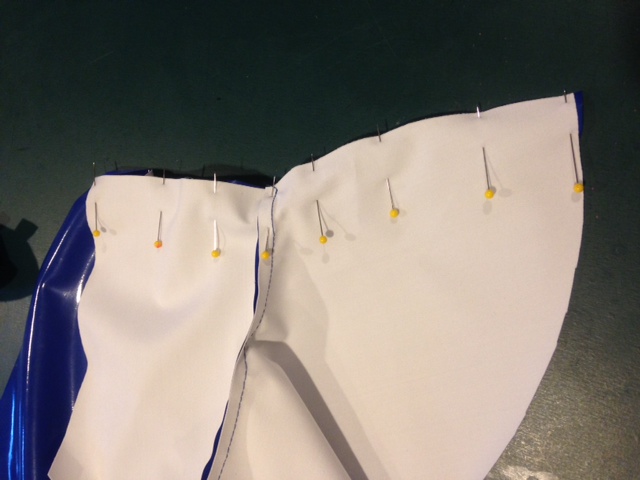 Now that all the ruffles have been attached to their correct yokes, attach the side seams of the left and right yokes to the side seams of the front skirt yoke.
Step 6: Attach the waistband
 You should now have your skirt in one long piece like the in the image – with the waistband the only other piece. Sew your waistband to the skirt section.
Step 7: Sew rear of skirt together
Once the Waistband is attached sew the right back yoke seam to the left back yoke seam. Your skirt is now complete! You don’t need a zipper because the material has plenty of stretch and will slide on over your hips, but you could add one to this pattern if you wanted.


I didn’t realize leather needles would make such a difference with stretch vinyl, but it makes sense. The order of sewing the front and back yokes to their ruffles was easy to follow.
I appreciated the note about using a roller presser foot and threading it through the center hole, that always trips me up with vinyl. The 1/4 inch seam allowance throughout keeps things really consistent too.
I like that you kept the process beginner-friendly while still working with vinyl. The sequence of attaching side seams after the ruffles are connected to the yokes made the construction feel more manageable.
Spacing pattern pieces to conserve that 1.5 yards of vinyl is a great reminder, especially since this material isn’t cheap. I like how clearly you broke down the yoke to ruffle assembly.
Nice touch mentioning a seam ripper in the supplies list, because vinyl is unforgiving if you make a mistake. The step-by-step on joining the back yoke pieces was especially clear.
The clarification about having one long piece before attaching the waistband really helped me visualize the construction. I usually get confused right at that stage with multi-part skirts.
The step about skipping a zipper because of the 4-way stretch vinyl is super helpful. I’ve struggled with bulky closures before, so knowing it can just slide over the hips makes this much simpler.