

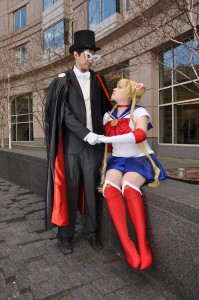
DIY tutorial blogger over at Crash.Culture// created a cool tutorial to create your own pair of boot covers for practically any cosplay. First, you’ll need a pair of shoes that you’d like to create covers for, 4-way stretch fabric in the desired color, a hote glue gun, straight pins, scissors, a sewing machine, a matching zipper, paper to create a pattern, a marker, chalk pen or tailor’s chalk, a microtex needle for sewing lycra style fabric and iron on tear away to use if you sewing machine has difficulty sewing with stretch fabrics.
- Use your base shoe to make alterations and eventually create a pattern.
- For this specific tutorial, she painted the heel and base of the shoe white and clear-coated over the span of several days.
- Afterwards, she used the fabric for the boot cover and draped it around the shoe and leg. Get someone to help you pin together the fabric slowly, you’ll want to make sure the fabric is not wrinkling or puckering.
- Mark the finished line of pins on both edges, then remove the pins and take it off.
- Next, take all the pieces you have draped and trace them using the pattern paper. Cut out these traced patterns and stack them on top of each other, with the back edges up. Ensure that all the front, back and top lines are the same. Use measuring tools like a ruler and curve in this step. Depending on your final design, you may need to make additional patterns for the desired shape and color.
- Trace the pattern again and make sure to add seam allowance of about 1/2″ around the edges. For this tutorial, she used Iron On Tear Away to help with assembling, along with a Microtex needle. One important thing to note is to use a stretch stitch when sewing. She recommends to do a chainstitch or another stretch stitch as opposed to topstitch on either side of the seams because of the stretchy nature of the fabric. At this time, you can add in your desired zipper to the cover.
- For the final step of attaching the covers, there are two ways to try it. First, you can attach it with the bootcover inside out, or you can choose to pull the bootcover inside out and fold in the seam allowance, and then glue it together to the shoe. For the first method, first turn the bootcover inside out and stretch it over the base of the shoe. Youu’ll want to align the front seam with the center front and the back seam with the center on the back point of the shoe. Work carefully and glue between teh bootcover and the where the shoe meets its sole. When you are finished glueing the pieces together, turn it inside out. The seam allowance should bei nside the cover and teh seam of the shoe will be hidden from view. Due to the stretchy nature of the fbaric, you will have to make sure to work slowly to avoid any accidents.
- The other option is to turn the bootcovers right side out. Next, you’ll want to fold the seam allowance and glue to the shoes. Start by gluing the center back point and center front point first, then continue through the middle. Work slowly, at the pace of about an inch at a time, pressing down as you continue on. She warned that this can be a tricky option because you can mess up the seam allowance and won’t be able to clip it. However, it does save you time with turning the boot cover right-side out later on.
The results are a dream come true when it comes to customized cosplay creations. Creating your own boot covers is a great way to complete that finishing touch to your dream costume. You can use a pair of discounted shoes from the local thrift store for even more savings. We can all relate to the hassle of trying to find a pair of shoes that match a far-out costume from a beloved anime or gaming series. Save yourself the stress and time by creating a pair of customized boot covers for your next costume. When it comes to fabric ideas, we have plenty of choices like 4-way stretch fabric in tons of fun colors and patent vinyl with high gloss.


Matching Products:

Gold Stretch PVC
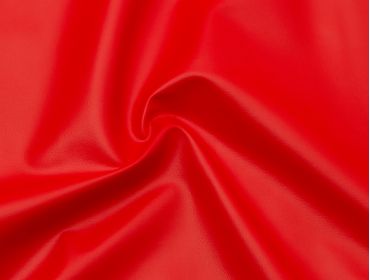
Stretch Red Faux Leather
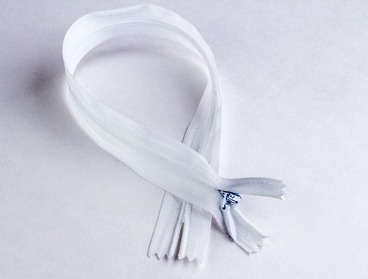
White nylon non-separating Zippers


I like that you mentioned working about an inch at a time when gluing. Rushing that step is exactly how I’ve ruined past projects.
Adding a 1/2 inch seam allowance when transferring the pattern to paper is easy to overlook, so I’m glad you called that out. It saves a lot of frustration later.
Using thrift store shoes as a base is honestly one of the best budget tips here. It makes experimenting with custom covers feel much less intimidating.
Highlighting patent vinyl and stretch PVC as material options opens up a lot of creative possibilities. I’m already thinking of a glossy armor-style build.
The step where you drape the 4-way stretch fabric directly on the shoe and pin it slowly really stood out. Having a second person help seems essential to avoid puckering.
The use of curves and rulers when refining the paper pattern was a nice detail. It shows how much precision goes into making the covers look polished.
Painting the heel and base white with a clear coat over several days was a nice touch. It makes the finished boot covers look way more integrated with the original shoe.
The advice to align the front and back seams with the center points of the shoe is something I’ve messed up before. It really affects how professional the final result looks.
I’ve struggled with zippers in tight cosplay pieces, so the reminder to install it during assembly rather than after was helpful. It makes the whole process cleaner.
The note about not being able to clip seam allowance when using the right-side-out gluing method is a great warning. That could easily trip up beginners.
I appreciated the emphasis on using a microtex needle and stretch stitch, since lycra can be such a pain on a regular setup. The tip about iron-on tear away is something I hadn’t considered before.
Calling out chainstitch or other stretch stitches instead of topstitching is key. I’ve had seams pop before because I ignored that with stretchy materials.
I found the suggestion to use a chalk pen or tailor’s chalk for marking really practical. It’s much easier to see than guessing with pins alone.
Stacking and aligning all pattern pieces before cutting fabric is such a simple step, but it ensures symmetry. That part of the tutorial felt especially thorough.
This tutorial really addresses the common struggle of matching shoes to elaborate costumes. Making custom covers feels much more achievable after seeing the full process laid out.
The comparison between attaching the cover inside out versus folding the seam allowance and gluing was really useful. I didn’t realize how risky the second method could be.