

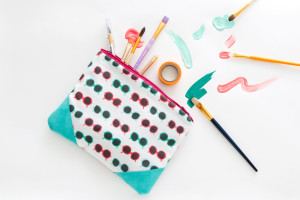
 If you’re looking for a few last minute gift ideas this holiday season, try out this easy do it yourself Zipper Pouch Tutorial originally posted by Brit + Co. First, you’ll need to decide on the overall look of your pouch. Some may want to incorporate graphic prints or striped fabric, while others might prefer a simple solid colored pouch. Pick up some durable fabric for lining and some faux leather fabric of your liking. You’ll also need a 7 to 9 inch zipper, matching thread, fabric glue, a tape measure, pins, a sewing machine, iron, fabric scissors and a seam ripper.
- Begin by first cutting out your pieces, two 10×7 inch pieces of fabric using the fabric scissors. You should have a total of six pieces.
- Next, use your iron at the appropriate setting for your fabric and remove all the wrinkles in the fabric. Match your zipper, with the zipper pull facing downward, up to the top edge of the fabric and lining fabric, facing upward.
- Match one piece of your lining fabric, facing down, on to the same edge. Attach three pins to the top edge, above the zipper. Sew the zipper in place, but remember to unzip it halfway and ensure the zipper pull is fully out of the way while you complete your sewing.
- Fold the fabric pieces and expose the zipper. Pin the other patterned fabric and lining pieces to the opposite side of the zipper. You’ll want to sew the second seam, repeating the same process as before and stopping to unzip halfway.
- After that, fold back both sides of the fabric with the patterned fabric facing up on either side of your zipper, and the lining fabric facing down.
- Next, you’ll focus on the solid corners of your pouch. Cut out and glue four leather corners to the appropriate spots on your patterned fabric. Wait for it to dry fully before moving on.
- Fold over the fabric so the patterned sides are facing one another and the lining pieces are facing each other. Sew around all three edges on each side.
- Rip out enough stitches in your sewn lining to fit your hand inside, and you’ll want to turn the pouch inside out. Unzip the zipper and turn the whole pouch inside out again with the pattern side facing outward. Pull out the lining completely and sew together the open seam.
- For the last step, place the sewn lining back inside the pouch, and you’re all set.
Adding faux leather fabric to the corners gives this pouch an edgy, contemporary feel. These mini pouches are the perfect remedy for all of the knick knacks found at the bottom of a handbag. You can even store sunglasses, extra makeup, pencils or brushes for any other creative projects you might have in store. We have a plethora of faux leather fabric available for all of your do it yourself craft ideas, so make sure to browse through our options here at MJTrends!


Matching Products:

Black Faux Leather
$8.99

Red Faux Leather
$7.99
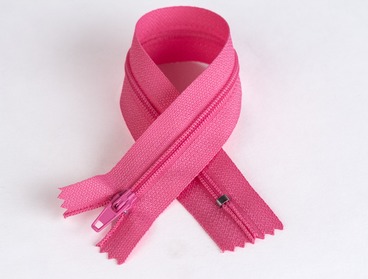
Hot Pink nylon non-separating Zippers
$0.79


The step about ripping open part of the lining to turn everything inside out is something I wouldn’t have thought of on my own.
This feels like a great last-minute holiday gift idea, especially since you can customize with stripes, prints, or solids.
Adding fabric glue for the leather corners instead of stitching them keeps the design simple without needing heavy-duty needles.
I like how the tutorial calls out using a 7 to 9 inch zipper and reminds you to unzip halfway while sewing, that’s the exact step I always forget.
The instruction to keep patterned sides facing each other before sewing the edges helps visualize the final flip better.
Stopping midway to unzip the zipper while sewing both sides is a lifesaver tip and prevents getting stuck at the end.
I appreciate the reminder to iron out wrinkles first, it’s such a small step but makes sewing the zipper seam much cleaner.
I like that the tutorial balances design choices with practical steps, like durable lining fabric paired with the decorative outer layer.
The faux leather corner detail really does give it that edgy look, and gluing them before sewing the sides seems like a smart way to keep everything aligned.
Using faux leather instead of real leather makes this much more approachable and budget-friendly for small gifts.
I didn’t realize how many tools were needed upfront, but having the seam ripper listed is realistic since mistakes happen.
Cutting six total pieces at 10×7 inches makes this feel manageable even for beginners, especially with the clear order of lining and outer fabric.
Using both patterned fabric and a solid lining gives it a more polished finish, not just a quick craft project.
The size sounds perfect for tossing in sunglasses or makeup, which is exactly what I need to organize my bag.
Matching the zipper pull facing downward at the start was a helpful detail, since I’ve definitely attached zippers backward before.