

 If you love all things dark and moody, try out a goth-inspired take for your next look. Embrace your inner royalty by wearing a spiked crown headband made from latex. Gather your materials, including rubber cement, thinner, a fabric hole punch, gel pens, a ruler, measuring tape and rotary cutter. When it comes to fabric and accents, it depends on your overall design. We have a diverse selection of latex fabric available, the thicker gauges would work well for this tutorial. You can go bold with a set of larger sized spikes, or keep things more subtle with smaller sized ones. This tutorial was originally created by blogger Creating Messes and should only take you about a half an hour.
- Measure out the exact size of your headband and begin by cutting the latex fabric to the desired length. For example, in this tutorial, her finished dimensions were approximately 20 inches long and an inch wide.
- After the fabric is cut out to the appropriate dimensions, use the gel pens to mark where you’d like to place your spikes.
- Lay out your spikes flat before attaching them to make sure they are exactly the way you’d like them to be.
- Next, use the hole punches to create spaces for where your spikes will be attached. After that, you’ll want to put the spikes in and screw the backs in place to attach them to the fabric. You can even use a screwdriver for an even more secure fit.
- Glue the two ends of the crown together. Work slowly to avoid any careless mistakes.
- Hold the two ends together and use the gel pen to mark the space where you’d like to glue. Be sure to give the glue at least five minutes to dry.
The finished product makes for a cool, edgy statement piece. Pair with a graphic tee and a simple slicked back pony for a rock inspired look. Or, go for a mysterious, glam theme by pairing with a sheer blouse and matching jewelry, like a bib necklace, studded bracelet and plenty of bangles. If your style is more subtle, choose smaller sized spikes and team with a plain white blouse.
You’ll have all eyes on you with this shimmery headpiece. Amp things up a notch by matching the color of your latex fabric with your lip, like a noir-inspired makeup palette and a daring all-black lip. For a fierce collaboration, create an eye catching latex headband with spikes following this simple and easy tutorial. When purchasing your supplies, be sure to browse our plethora of spikes and latex fabric options available for sale here at MJTrends.


Matching Products:
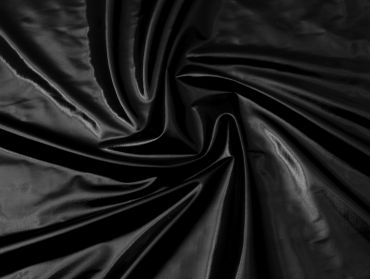
Black Patent Vinyl
$9.99
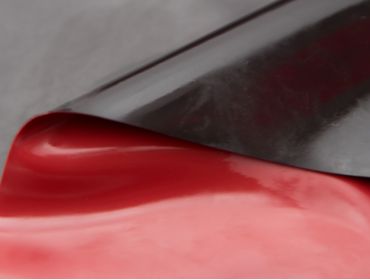
Double Sided Black Red .80mm
$20.99
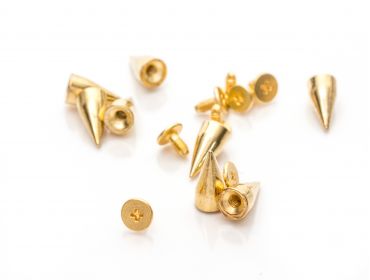
Gold cone Spikes
$0.20


It’s helpful that you mentioned marking where to glue before actually applying adhesive, since latex can be unforgiving if misplaced.
The half hour timeframe makes this feel approachable, even for beginners who might be intimidated by working with latex fabric.
The tip about using thicker gauge latex makes sense, especially since thinner sheets would probably warp once the spikes are screwed in.
Seeing the reference to Creating Messes adds credibility and makes me curious to check out the original version of the project.
I appreciate that you included outfit pairings for different styles, from edgy graphic tees to more subtle white blouse combinations.
Using gel pens to mark placement is such a simple step, but it’s helpful for keeping everything symmetrical before committing to punching holes.
I like how you emphasized laying out the spikes before attaching them, because spacing can really make or break the look on a narrow one inch band.
I like that the tutorial keeps tools pretty basic, aside from the rotary cutter, which makes it accessible for most DIY crafters.
I didn’t realize a fabric hole punch would work well on latex, but that seems much cleaner than trying to cut holes manually.
The 20 inch by 1 inch measurement example gives a clear starting point, especially for anyone unsure how long to cut their first headband.
The note about working slowly to avoid careless mistakes is important, especially when aligning the two ends of the headband.
The styling ideas were a nice touch, especially pairing the crown with a slicked back pony or sheer blouse for different vibes.
The idea of using a bib necklace and bangles with the crown gives it a more glam direction instead of just punk or goth.
Interesting that rubber cement and thinner are listed, since a lot of people forget how important proper adhesive is when working with latex.
Choosing between large dramatic spikes and smaller subtle ones really changes the aesthetic, so I like that you highlighted both options.
I’ve tried similar projects and rushing the glue step always causes issues, so the reminder to wait at least five minutes is spot on.
Marking spike placement before punching holes seems like a small step, but it probably prevents a lot of uneven spacing issues.
The finished piece sounds like a strong statement accessory, especially with the shimmer of latex and the added dimension of spikes.
The suggestion to match the latex color with a black lip or noir palette really completes the goth-inspired look you’re going for.
I appreciate the suggestion to use a screwdriver for securing the spike backs, since hand tightening alone can feel a bit flimsy on latex.