

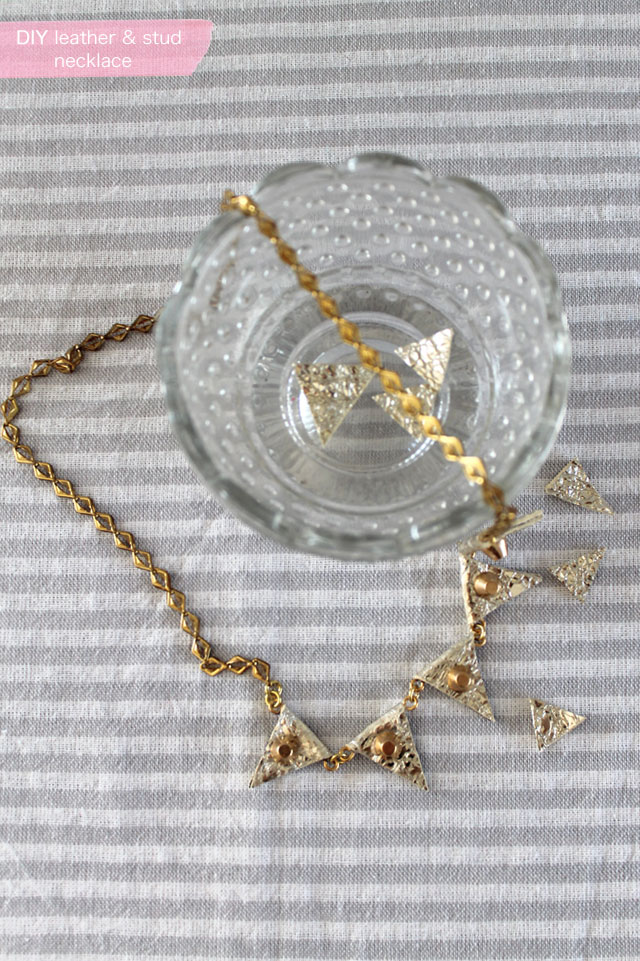
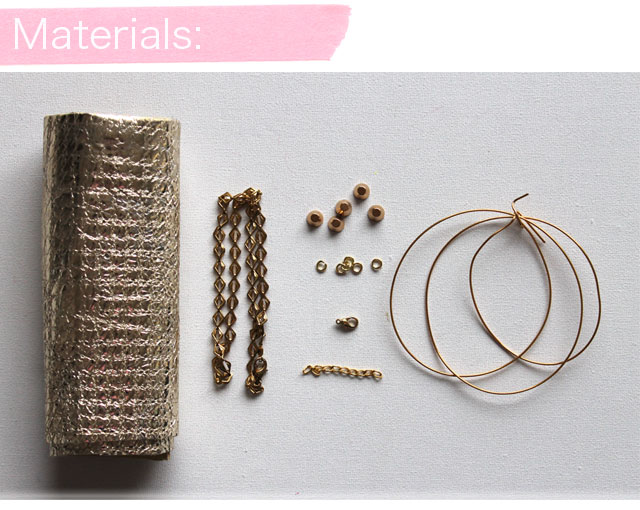
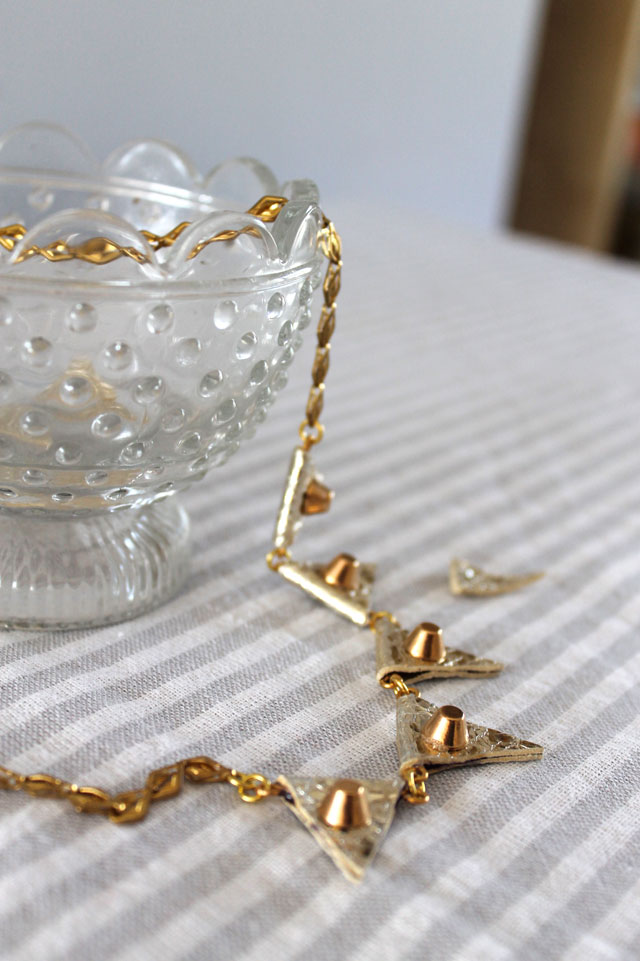
Ready to spruce up your summer wardrobe? Follow this easy DIY tutorial from Lotts & Lots to create a mixed texture studded necklace. In this tutorial, snakeskin fabric, vintage chain, studs, 5mm jump rings, 1mm wire, a lobster clasp, connection chain and glue were needed as materials.
- First, start off by cutting 5 pieces of wire about 8cm each.
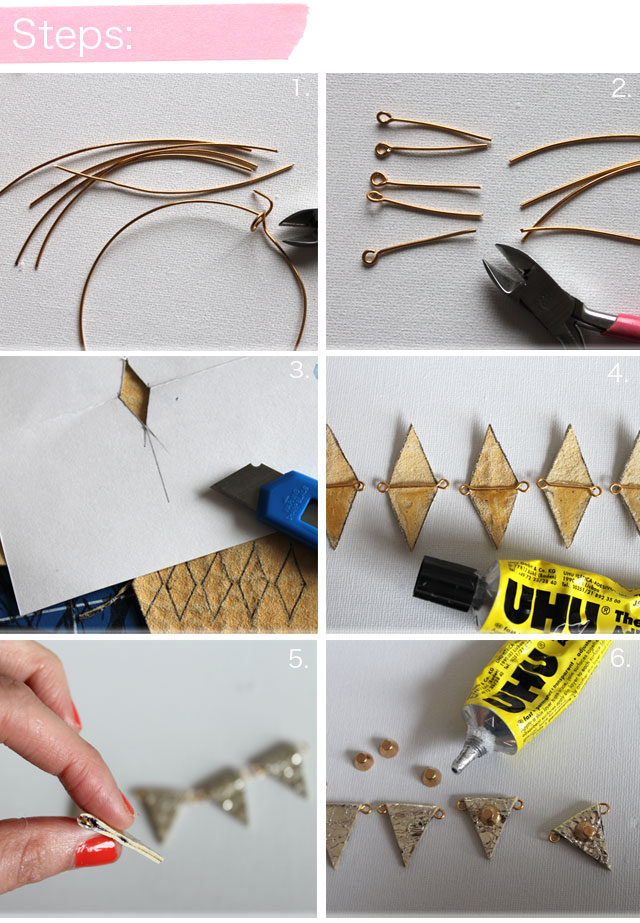
- Then, make loops around the ends of the wire by rolling each end around a pair of pliers. Measure 2.8 cms form the bottom of the first loop, then cut off the excess, and create another loop.
- Start by making a pattern for the triangle shapes – take a piece of paper and create a shape about 2 cm across and 2.5 cm tall to make your triangle. Fold the paper, then cut out the triangle shape using scissors. The aim is to create a diamond shape. You’ll repeat this step 5 times and then trace the shape onto the back of your fabric.
- Take your fabric and put the wire right into the middle of the shape, then apply glue. Fold the leather in half and press together firmly.
- Apply your studs to the middle of each triangle. After that, leave it to dry completely.
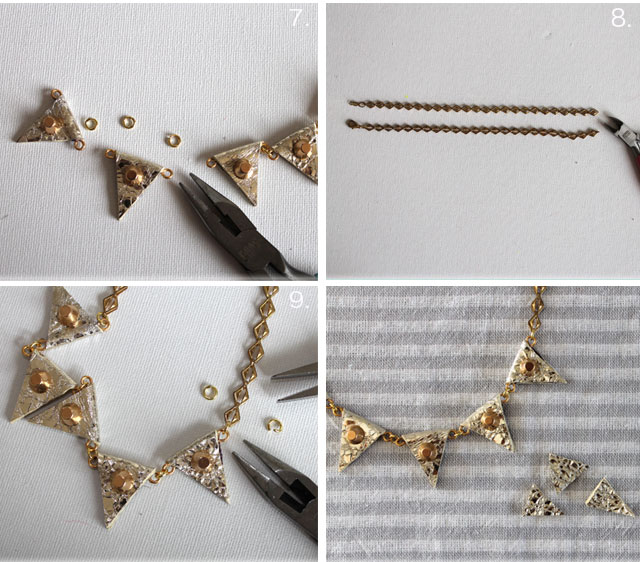
- Use your jump rings to link the triangles together. For this tutorial, she used a vintage necklace as a chain, which was about 40 cm long, and then she cut it in half. You could also use a standard chain, around 20 cm long, and add a lobster clasp at one end and 5 cm piece of connector chain to the other end.
- Add the chain to the leather pieces for the final step.
All credit for this tutorial goes to DIY blog Lotts & Lots. Make sure to browse through our wide array of studs and snakeskin fabric options, available for sale here at MJTrends. You could alternate different colorways for a pop of color, or keep things the same for a monochromatic look. Talk about a fun and easy summer DIY!
Written by Jade Nicolette
Matching Products:
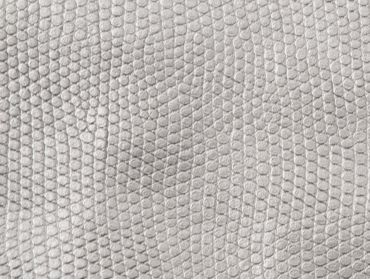
Metallic Silver Snakeskin
$8.99
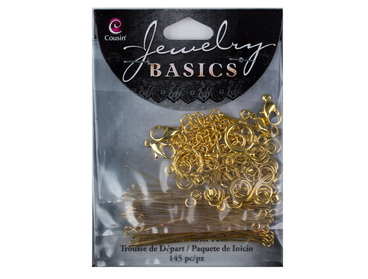
Gold starter kit Bracelets Necklaces
$3.99
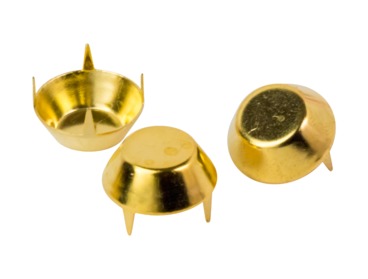
mushroom gold small Studs
$0.10


The trick of folding the paper to create a symmetrical diamond from a triangle template is clever and easy to follow, especially for someone who struggles with getting shapes even.
Repeating the triangle process five times keeps the design balanced, and the stud placement right in the center ties all the pieces together visually.
Adding a 5 cm connector chain at the end is a nice touch for adjustability, especially for summer outfits with different necklines.
The mix of materials like 1mm wire, leather, and metal studs gives this necklace a layered look that feels more high-end than a typical DIY.
Cutting a vintage chain in half for the base is a smart reuse idea, and the 40 cm length seems just right for a statement piece without being too heavy.
The measurements for the triangle template, around 2 cm wide and 2.5 cm tall, make this project approachable without needing precise tools.
I like how the tutorial uses 5 pieces of 8cm wire to keep the triangles consistent; that detail makes the finished necklace look much more polished instead of uneven.
I hadn’t thought about using 5mm jump rings to connect each triangle, but it makes sense for flexibility so the necklace drapes nicely instead of sitting stiff.
The step about placing the wire in the center before gluing the leather is important, otherwise I imagine the shapes would lose structure quickly.
Using snakeskin fabric with studs gives a nice contrast between texture and shine, and I appreciate the suggestion to either go monochrome or mix colors for more impact.
I like that the tutorial offers an alternative with a 20 cm standard chain and a lobster clasp, so you don’t have to rely on finding a vintage necklace.
Leaving the glued pieces to dry completely before adding studs feels like a small but crucial step that could easily be rushed and ruin the finish.