
DIY Rain coat tutorial
 Email App
If you’ve constantly been drooling over clear rain ponchos, season after season, it’s nigh time to try and create one of your own. We decided to take a closer look at how to make your own transparent rain cape by following this simple DIY tutorial provided by Geneva Vanderzeil.
Sure, we’ve all seen the transparent raincoats on runways and touted by big name designers, but we’re really not too keen to spend that much on a garment. If you’re on a budget, we totally understand, so try this thrifty alternative for this transparent trend.
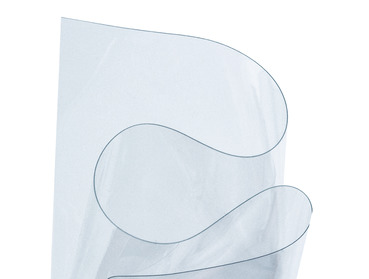
- First, you’ll need to assemble your materials. Start by getting at some transparent vinyl fabric measuring at least 1.5 meters or 60 inches (long edge) and 1.25 meters or 50 inches (short edge). You’ll also need some duct tape, and for this project, she chose to use the “Lace Vegas” duct tape from Scotch. You can use other versions, but she preferred this style because it is definitely waterproof. You’ll also need about 10 inches or 25 centimeters of black grosgrain ribbon, superglue or epoxy resin, a belt buckle, matching needle and thread and a pair of scissors.
- Fold your PVC fabric in half, and then in half one more time.
- After that, you’ll need to follow a pattern to create a rounded shape for the overall garment.
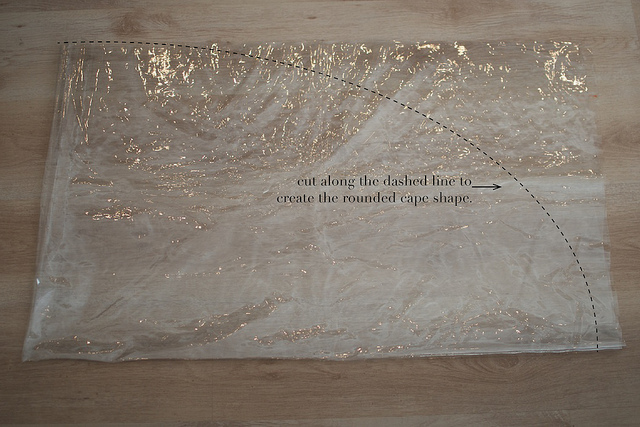
- Unfold the fabric once, and then you’ll need to cut out a small hole for the neck line. If you have a mannequin, you can lightly drape the fabric over it in order to get a better understanding of the process.


- After that, grab your scotch tape and trim off the edges. You’ll need to repeat this step to create some thin strips for the raincoat.
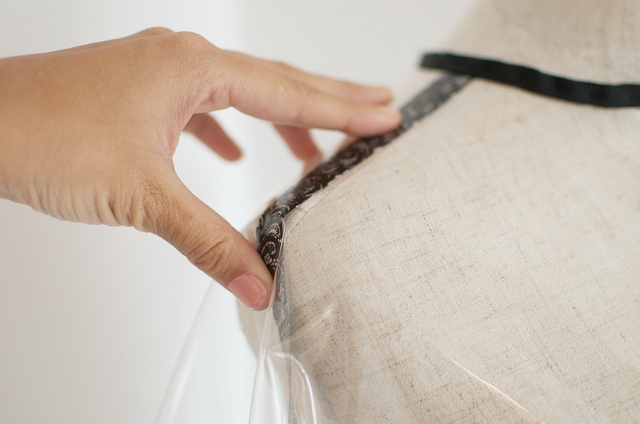
- Attach the ribbon over the edges of the neck area, and then sew in place with the needle and thread.
- Next grab your belt buckle. For her design, she decided to attach the belt buckle to the neckline, but you can always place it elsewhere if you’d like. Use glue and secure the belt buckle in place, then let it dry. You can also add some tape to make a paneled type of design.
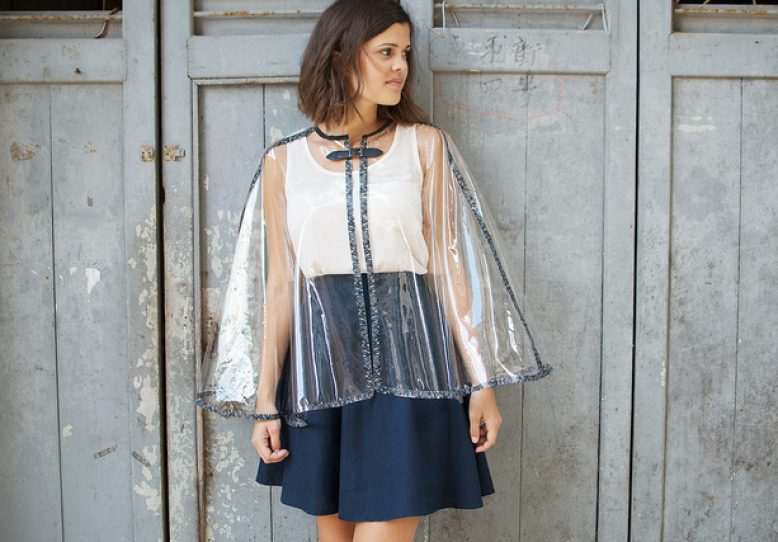
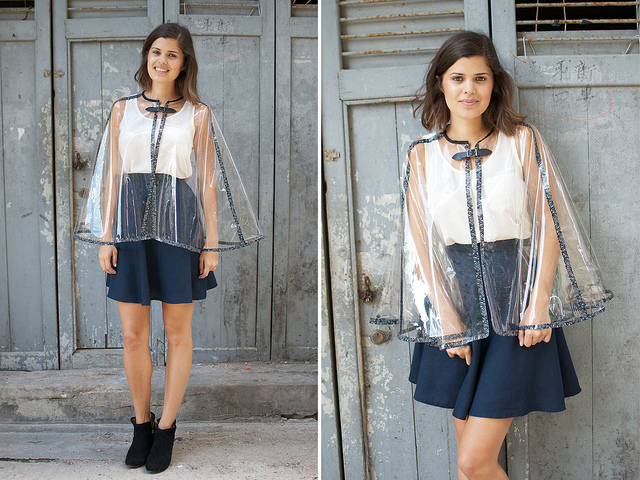
The finished product looks totally polished and oh so chic! We’ve got total heart eyed emoji’s going on right now. If you need styling ideas, try throwing it on with a camisole, a flirty skirt and a pair of ankle booties.
Wear when you’re out in action at a cool music festival, or simply when you’re off running errands in town. All credit for this do it yourself tutorial goes to Geneva Vanderzeil, an Australian blogger who runs the blog A Pair and A Spare DIY.
http://apairandasparediy.com/2012/07/diy-burberry-inspired-transparent-rain-cape/
Written by Jade Nicolette
Matching Products:
Clear clear vinyl material 6 gauge
$2.99
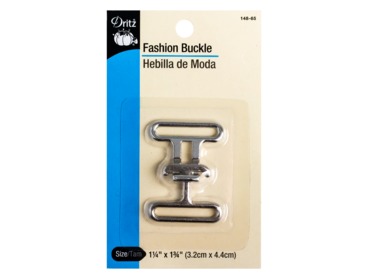
silver buckle Clasps
$3.69
black pinstripe PVC
$8.99
No Comments