Create Patent Vinyl / PVC bias binding to match your garment!!
Posted by shinyskintight on: Feb 16th 2015 9:13:24 pm

Hello MJTrendster's!
Just wanted to share a way to create your own Patent Vinyl
or PVC bias binding that matches your garment. Save the scraps after you've cut
your pattern, you may just have enough to be able to use that for this process
:)
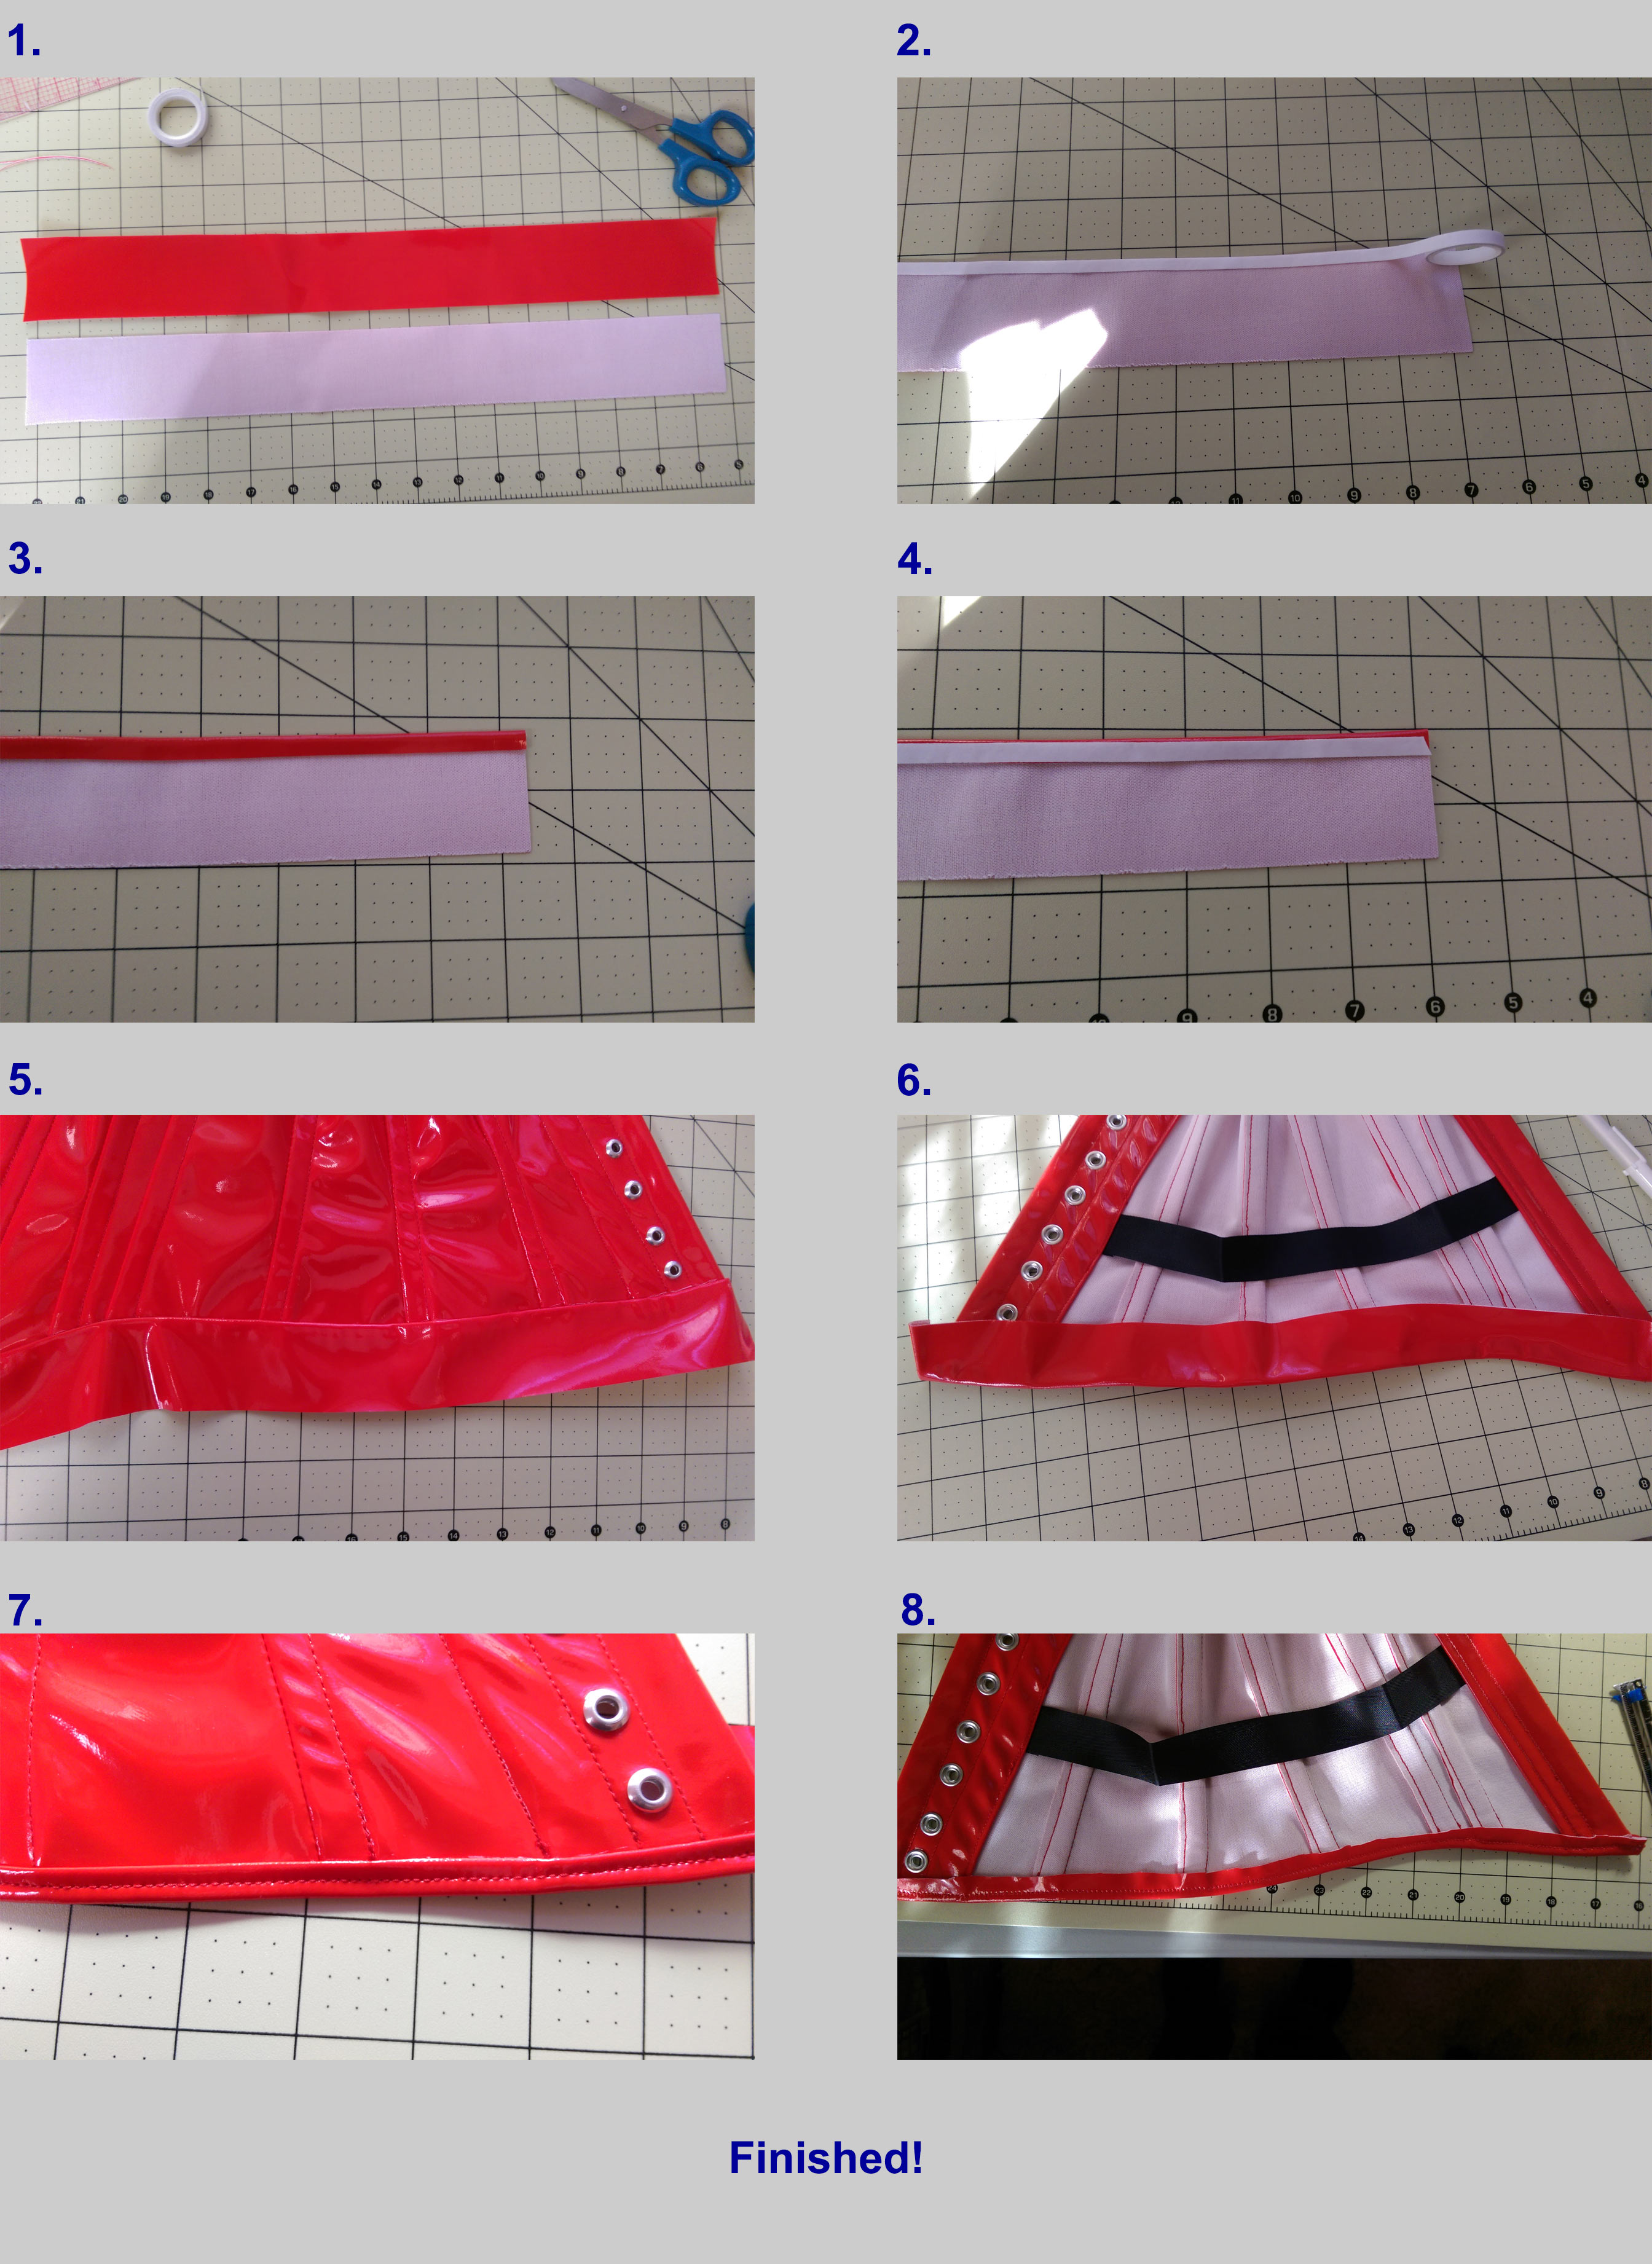
The numbered photos above correspond to the steps numbered below.
REASON FOR THIS POST
I have been having trouble locating a suitable bias binding
to finish the edges of my patent vinyl and PVC projects. Bias tape makers are
not suitable for these materials due to the "sticking" that occurs
while they are put against metal (that's also why they have special presser
feet specifically for these types of materials). Until now, I've just been
rolling over the edge of the garment, top- stitching and done. Sounds easy, well
sometimes. But on some garments, in my opinion, it just doesn't give a good clean,
professional finished look. And sometimes can be difficult to actually get the
material to stay where it needs to be while top stitching. So, I got creative
and came up with this!
I'd love to hear any comments / suggestions- feedback from anyone who's tried this or has a different method of achieving the same result. Just wanted to put this out there in hopes that it can help make a clean finished look to your Patent Vinyl or PVC garment!!
Materials needed:
1 1/2" - 2" wide strips of material being used (lengths
will vary upon raw garment edge dimensions) Note: I've found using wider piece
will give the feed
dogs something to grab on to while doing this process. One may find a
suitable width smaller than this for the same result.
1/4" wide Wondertape(tm) (Again, amount will vary
depending on raw edge lengths of garment)
Seam gauge & preferred erasable marking utensil suitable
for material
Steps:
1. Cut desired length of fabric being used. Add about
another 1" so it can be folded behind 1/2" on each start and finish
edge.
2. On wrong side of material, run a strip of 1/4"
Wondertape(tm) along edge.
3. Peel off protective backing from Wondertape(tm) and flip
the right side of fabric over to stick wrong side to wrong side.
4. Run another strip of Wondertape(tm) slightly under the
edge created in last step. This is now the first part of the bias.
5. Using seam gauge and marking utensil, on right side of garment, mark 1/4" from raw edge. Using this line as a guide, peel off
backing from step 4 and stick entire
piece of bias along raw edge of garment. Remember to fold at least 1/2"
behind both start and end!!
6. Fold bias underneath to wrong side of fabric. (Optional,
but helpful, run one more piece of Wondertape(tm) along the inside raw edge of garment to ensure the bias is held in
place when folded).
7. On right side, top-stitch 1/8" from edge of bias.
8. Flip garment over to wrong side and carefully trim bias
down to desired width.
Finished!!
Repeat same steps on the rest of raw edges of garment.
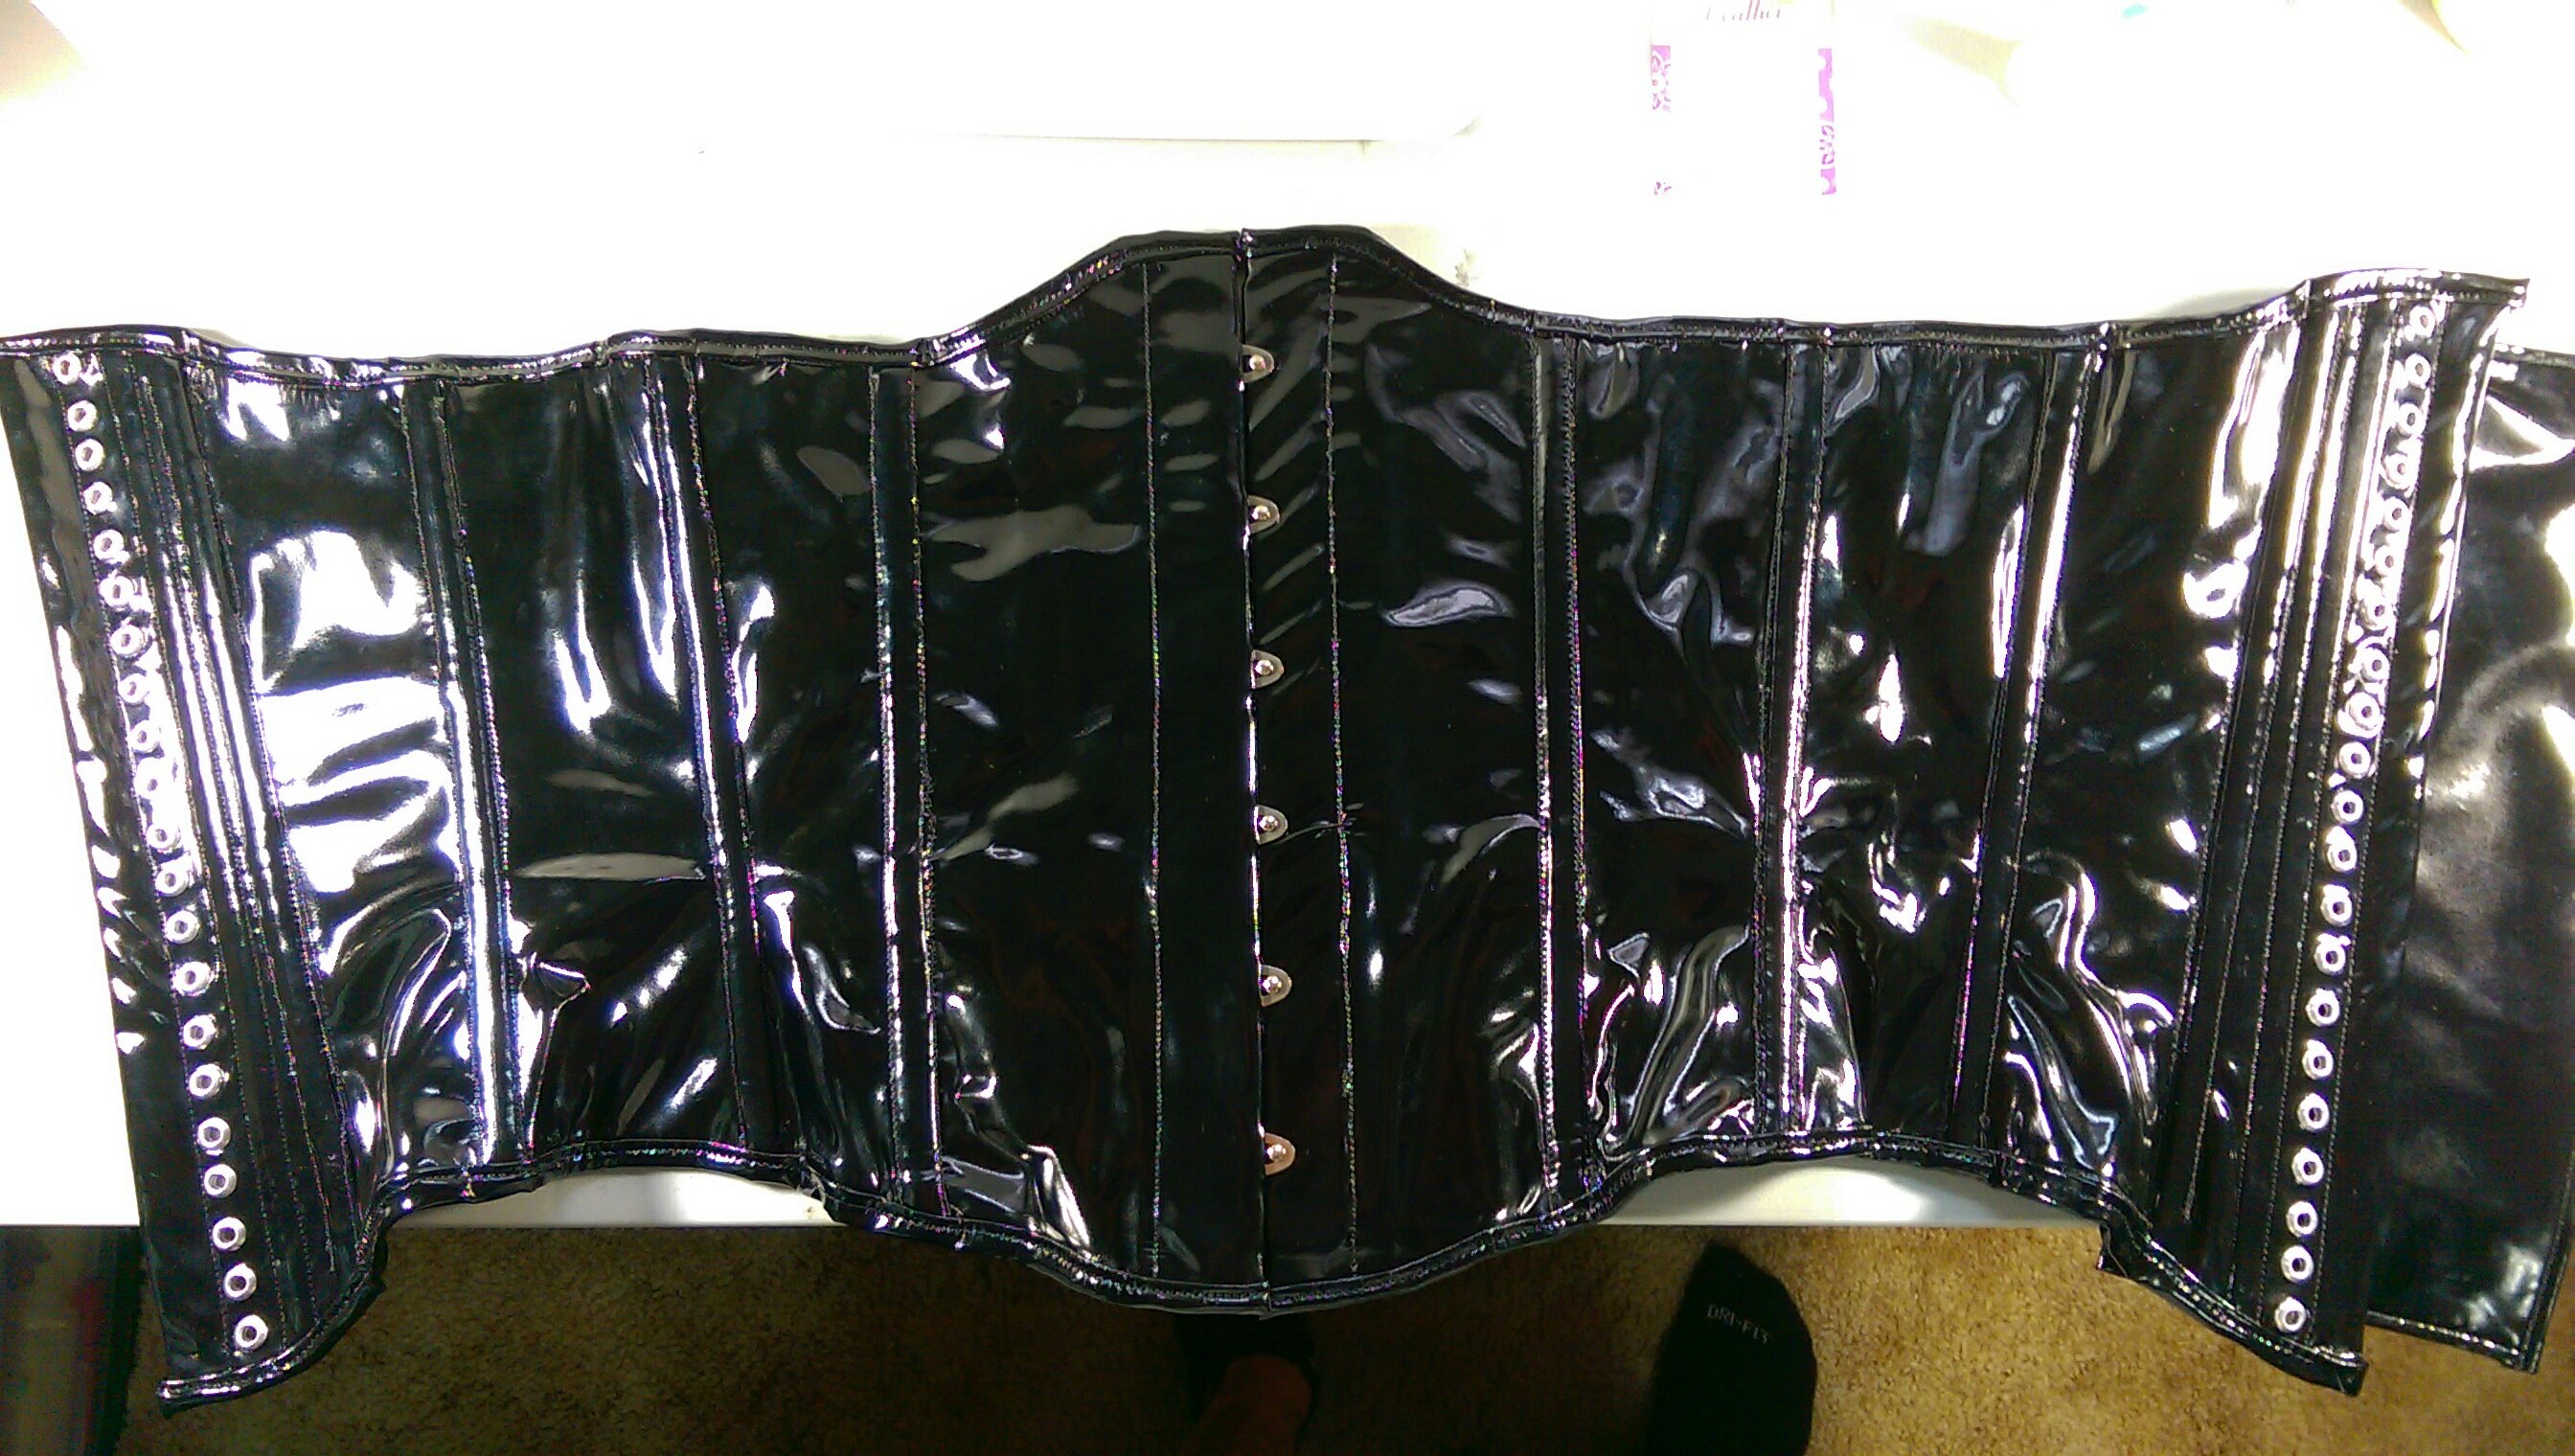
In this example I was working on an under-bust corset.
Tips for corsets:
IMPORTANT...take boning out before doing first application
of bias
IMPORTANT.. after completing first bias application PUT THE
BONES BACK IN all the way to that finished edge before applying bias on the
other raw edge!!!!
Side tip: Some places can be a bit thick to sew over, ie
existing seams folded over in the garment, so be sure to have presser foot
tension on a low setting (if available on your machine) or material will not
move and thread will get bound up in these locations. It is also helpful to use left hand to gently pull the
garment through when stitching in these locations to continue a smooth stitch
over thicker areas.
I hope this can help everyone out there wanting a clean professional looking bias finish that matches their Patent Vinyl or PVC material
used for the garment!! Questions or comments welcome :)
Cheers,
Shiny
4