

Jessica from JewelryTutorialHQ.com and Bespangled Beads on Etsy created a super simple DIY tutorial highlighting how to set snaps in leather using Dritz Snap Setting Pliers.
- First, she took a section of soft, supple leather that she salvaged directly from an old handbag from another tutorial. For further craftiness, she even took the excess leather and braided it into a chic bracelet. Jessica made sure to remind everyone that she was working with a thin leather fabric for this project.If your fabric is a little bit thicker or a stiffer type of leather, you might want to consider other options for setting snaps.
- The Dritz Snap Setting Pliers come complete with an assortment of adapter attachments, which are perfect for setting various sizes of snaps with them. For this tutorial, she used snaps that are 7/16″. Make sure you have the correct adapters fitted onto your pair of pliers. For the 7/16″ snaps, you will need both rubber adapters on the pliers.
- Beginning with the prong side, attach the snap to the bottom part of the jaw, which does not have the plastic ring. On the opposing side, place the male component of the snap and center it on the fabric.
- Give yourself at least 1/2 inch for seam allowance and squeeze the pliers firmly to set the snap. For the other side, make sure the right side is facing up. The middle part should be sticking up, and this should face upward when you set it into the bottom jaw of the pliers.
- Next, use the pearl part of the snap and cover it with a little tape before setting it into the jaws. Repeat the same steps as before and squeeze the pliers tightly. If you’re using plain snaps, you won’t need to use any tape to protect the outer lining of the snaps. That is only used for special snaps, like the faux pearl snaps.
This tutorial used faux leather fabric and dritz snaps which we have available for sale here at MJTrends. Remember, this do it yourself tutorial is just a baseline and works perfectly with a leather jacket or vest. Feel free to substitute this tutorial for adding decorative snaps to practically any type of fabric. Stay connected for updates on our blog as we continue to highlight more DIY magic!
Written by Jade Nicolette
Matching Products:

Black Faux Leather
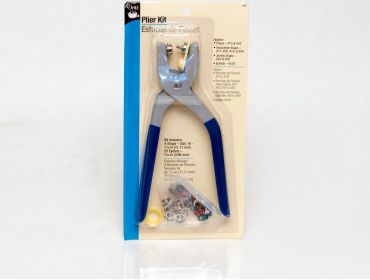
Plier kit Eyelets and Snaps

easy attacher kit Eyelets and Snaps


The explanation of placing the pearl cap into the jaws after taping it was clear and easy to follow compared to other guides I’ve seen.
The salvage aspect of using an old handbag for materials is inspiring and practical, especially for beginners who don’t want to buy new leather.
I like how you broke down each step for both sides of the snap, since that’s usually where tutorials skip details and cause confusion.
The detail about using both rubber adapters for the 7/16 inch snaps was really helpful, because I always get confused about which attachments to use with my Dritz pliers.
The guidance about working with thinner leather versus stiffer material was important, since not all snap tools handle thicker hides well.
Good call on giving at least a half inch seam allowance before setting the snap; I’ve definitely placed snaps too close to the edge and had them tear out.
I’ve got the same plier kit with multiple adapters and never knew which combo to use, so specifying both rubber adapters for this size helped a lot.
I’ve struggled with getting snaps aligned, so the emphasis on centering the male component before pressing was really useful.
The step about making sure the middle part is sticking up and facing upward when placing it in the pliers helped me visualize the process better.
I didn’t realize the bottom jaw without the plastic ring is where the prong side should go, so that detail alone made this tutorial worth reading.
This makes the Dritz Snap Setting Pliers seem a lot less intimidating, especially with the breakdown of each attachment and step.
The reminder that plain snaps don’t need tape while decorative ones do cleared up something I’ve been overthinking in my own projects.
Using leftover leather to braid a bracelet was a nice bonus idea and made the project feel less wasteful overall.
Covering the faux pearl snap with tape before setting it is such a small step, but it makes sense to prevent scratching the finish.
I appreciate that you pointed out this is a baseline tutorial and can be adapted to other fabrics beyond faux leather.
I liked how you explained the orientation of the prong side versus the male component, especially centering it on the fabric before squeezing the pliers.
I appreciated the tip about using thin, supple leather from a salvaged handbag, since that’s exactly what I have lying around. The note about thicker leather needing different tools saved me from ruining a piece.
The mention that this method works well on jackets or vests gave me ideas for upgrading some older pieces I already own.
This tutorial makes adding decorative snaps feel approachable, especially with the clear notes on positioning and protecting the snap surface.